- Vol.124
- WEB
- Vol.124
- WEB
- 2021.3.23
保存版 Cloud Functions for firebaseのはじめ方
ここ最近、TIPSでサーバーレスについて紹介してきました。今回はそれに関連し、Cloud Functions for firebaseを紹介します。この技術自体は目新しいものではなく、ある程度成熟したサービスと言えます。だからこそ、初めての方だけでなく、久しぶりに使うけど何が必要なんだっけという方にこそ役立つマニュアルがあったら良いなと思い、今回執筆することにしました。
エンジニア
N.U.

Cloud Functions for firebaseとは?
Cloud Functions for firebaseはGoogleが提供するクラウドサービスです。そのため、サーバーの構築や保守をすることなくプログラムを実行することができます。
事前準備
①Googleアカウントを取得します。
②上記①のアカウントでfirebaseコンソールを開きます。
https://console.firebase.google.com/
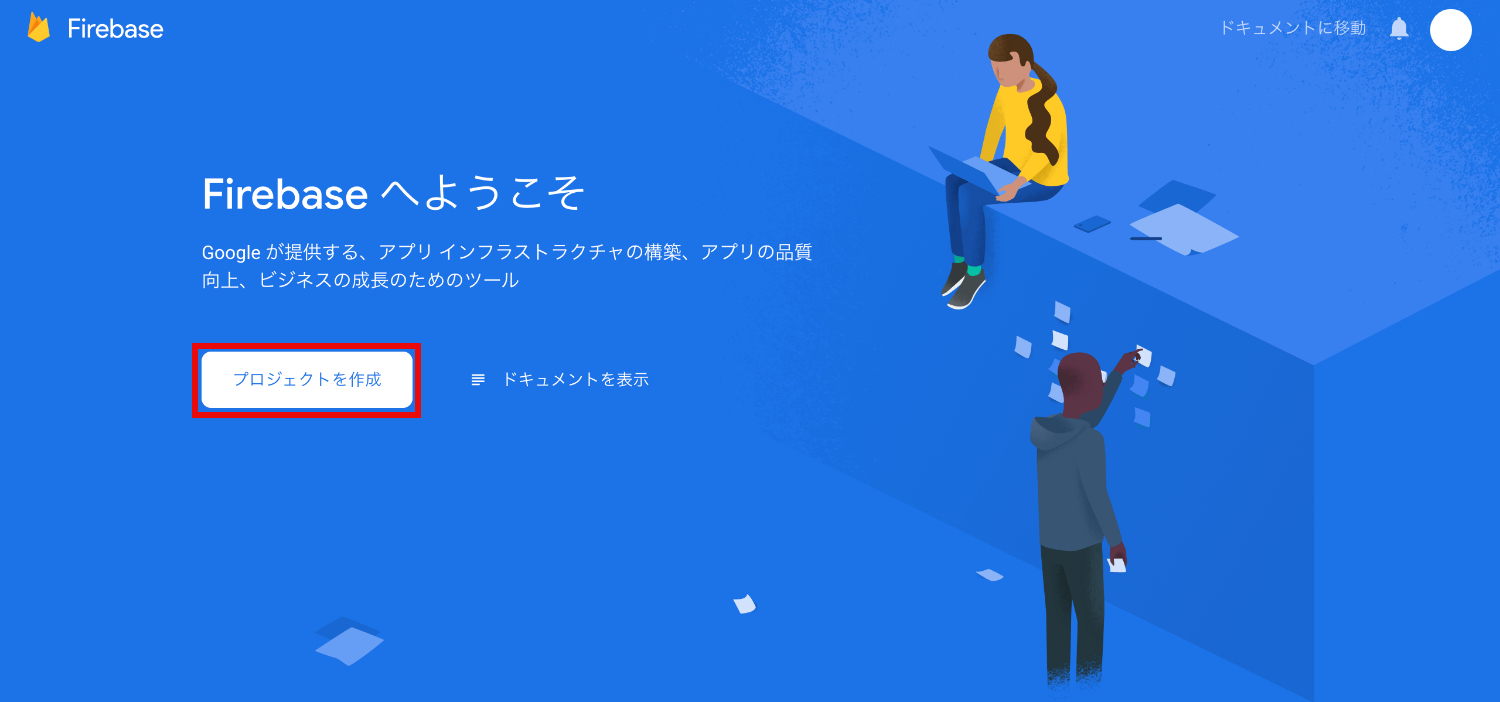
③[プロジェクトを作成]をクリックし、手順に従ってプロジェクトを作成します。

④必要に応じて、ユーザーと権限の設定をします。
画面左上の[設定マーク] > [ユーザーと権限]をクリックすると設定画面が開きます。
ちなみに、編集者権限だとFunctionsのDeployは出来ません。

⑤料金プランを変更します。
無料枠だとCloud Functionsは使えないので、従量課金制(Blaze プラン)に変更します。
プロジェクトの設定
事前準備ができたら、プロジェクトの設定をします。
ローカルでフォルダを作成・移動する
まずは、ローカルでフォルダを作成し、移動します。
mkdir test-project
cd test-project
Firebase CLI を設定する
プロジェクトでfirebaseコマンドを使うためにインストールします。
npm install -g firebase-tools
FIrebaseにログインをする
firebase login
上記のコマンドを実行すると自動でブラウザが立ち上がるので、アカウントを選択してログインします。以下のような表示が出たらログイン成功です。
❯ firebase login
Waiting for authentication...
device to log in:
✔  Success! Logged in as [email protected]
アプリの初期化をする
アプリの初期化のために、以下のコマンドを実行します。
firebase init
すると、以下のような表示が出てきます。
❯ firebase init

     ######## #### ########  ######## ########     ###     ######  ########
     ##        ##  ##     ## ##       ##     ##  ##   ##  ##       ##
     ######    ##  ########  ######   ########  #########  ######  ######
     ##        ##  ##    ##  ##       ##     ## ##     ##       ## ##
     ##       #### ##     ## ######## ########  ##     ##  ######  ########

You're about to initialize a Firebase project in this directory:

  /Users/XXX/Documents/test-project
生成する設定ファイルを選択する
使用したいサービスにカーソルを合わせ、Spaceで選択します。今回は、Functionsのみ選択しました。
? Which Firebase CLI features do you want to set up for this folder? Press Space to select features, then Enter to confirm your choices.
 ◯ Database: Deploy Firebase Realtime Database Rules
 ◯ Firestore: Deploy rules and create indexes for Firestore
❯◉ Functions: Configure and deploy Cloud Functions
 ◯ Hosting: Configure and deploy Firebase Hosting sites
 ◯ Storage: Deploy Cloud Storage security rules
 ◯ Emulators: Set up local emulators for Firebase features
Use an existing projectを選択します。
? Please select an option: (Use arrow keys)
❯ Use an existing project
  Create a new project
  Add Firebase to an existing Google Cloud Platform project
  Don't set up a default project
事前準備で作成したProjectを選択します。
? Please select an option: Use an existing project
? Select a default Firebase project for this directory: (Use arrow keys)
❯ test-project (test-project)
今回はJavaScriptを選択します。
? What language would you like to use to write Cloud Functions? (Use arrow keys)
❯ JavaScript
  TypeScript
今回はNoを選択します。
? Do you want to use ESLint to catch probable bugs and enforce style? (y/N)
Yesを選択し、npmをインストールします。
? Do you want to install dependencies with npm now? (Y/n)
これで、プロジェクトの設定が完了しました。フォルダを開くと、必要なファイルが作成されていることが確認できます。
Functionの作成
作成されたfuncions/index.jsの中身を確認します。コメントアウトをはずすとテスト関数が表示されます。
実際の開発では、この中身を書き換えていきます。今回はこのままDeployに進みます。
const functions = require('firebase-functions');

// Create and Deploy Your First Cloud Functions
// https://firebase.google.com/docs/functions/write-firebase-functions

exports.helloWorld = functions.https.onRequest((request, response) => {
 functions.logger.info("Hello logs!", {structuredData: true});
 response.send("Hello from Firebase!");
});
delpoyする
Functionが完成したらDeployしましょう。
firebase deploy
以下のように表示されたらDeploy完了です。
=== Deploying to 'test-project'...

i  deploying functions
i  functions: ensuring required API cloudfunctions.googleapis.com is enabled...
i  functions: ensuring required API cloudbuild.googleapis.com is enabled...
✔  functions: required API cloudbuild.googleapis.com is enabled
✔  functions: required API cloudfunctions.googleapis.com is enabled
i  functions: preparing functions directory for uploading...
i  functions: packaged functions (27.77 KB) for uploading
✔  functions: functions folder uploaded successfully
i  functions: creating Node.js 10 function helloWorld(us-central1)...
✔  functions[helloWorld(us-central1)]: Successful create operation.
Function URL (helloWorld): https://us-central1-test-project.cloudfunctions.net/helloWorld

✔  Deploy complete!

Project Console: https://console.firebase.google.com/project/test-project/overview
発行されたURLをブラウザに入力し、以下のように表示されていれば成功です。
Hello from Firebase!
応用編
ここからは、知っていると便利な機能をご紹介します。
デプロイ前にローカルで実行する
コードを修正するたびにDeployして動作確認だと大変です。そんな時はローカル環境で確認しましょう。
firebase emulators:start
ロケーションを変更する
デフォルトはアイオワリージョンです。せっかくなら近くが良いので、今回は東京リージョンに変更します。
index.jsに.region('asia-northeast1')を追加します。
exports.helloWorld = functions
.region('asia-northeast1')
.https.onRequest((request, response) => {
 functions.logger.info("Hello logs!", {structuredData: true});
 response.send("Hello from Firebase!");
});
? Would you like to proceed with deletion? Selecting no will continue the rest of the deployments.
Deployの際にus-central1(アイオワリージョン)を削除しますか?と聞かれるのでYesを選択します。
i  functions: deleting function helloWorld(us-central1)...
✔  functions[helloWorld(us-central1)]: Successful delete operation.
✔  functions[helloWorld(asia-northeast1)]: Successful create operation.
Function URL (helloWorld): https://asia-northeast1-test-project.cloudfunctions.net/helloWorld

✔  Deploy complete!

Project Console: https://console.firebase.google.com/project/test-project/overview
これで、東京リージョンのDeployが成功しました。
まとめ
うっかり抜かしがちな手順、設定方法なんだっけとなりやすい箇所をまとめた「痒いところに手が届く」手順書を目指しました。いかがでしたでしょうか。皆さんのお役に立てれば幸いです。
TAGS
RECENT POSTS
TRENDING
MORE FOR YOU
今日もあなたに気づきと発見がありますように
画面を回転してください